Friday, November 27, 2020

Unity Tutorial 09


This week’s tutorials were a continuation of last week's sphere sumo battle game. This week's tutorial focused on spawning more waves of enemies - where when a player manages to knock out the enemy sphere from the island, an extra enemy player would spawn on the next wave. This would work the same for the power ups. By adding this functionality it will increase the difficulty of the game and keep the player engaged.

 In order to do this, we were introduced to the for-loop method. The main idea behind the for-loop method is that rather than rewriting the same instantiate code to spawn multiple enemies, adding the  for-loop to the instantiate will loop it a number amount of times depending how many enemies you want to spawn for each round.

Unfortunately, this was difficult to understand as I was not able to test out the code for myself.  My Unity kept freezing every time I pressed the play mode. Funny enough, it only happened when I added the for-loop method in my IDE (shown in green).

Screenshot of code in my IDE

If I removed this line of code by turning it into a comment, the game would not freeze when I click on Unity’s play mode. I’m not sure why this is the case but I wasn’t really able to properly follow along and see if the code I put in the script actually works.


Here’s a screenshot of my frozen Unity. No pretty cloud particles in the background and no enemies spawning. 


For Challenge 4, I made a separate project as I was worried that it would freeze too and I  didn’t want to take any chances. I found this challenge the most difficult; not only because it was challenge 4 but I couldn’t look back at the code on  the Sumo battle project so I had to review it from the tutorial page.

Again, my biggest problem for this challenge was not being able to spawn extra enemies in every wave. I fiddled with the code here and there but couldn’t work out what I was missing. The thing I learned from programming a game is that you need a lot of patience and accept that sometimes it will be more mistakes than progress. I will try again with a clear mind and hope for the best.


Tuesday, November 24, 2020

Review Week Comments and Feedback


Overall, the comments I have received so far by other students are pretty good. I can understand, in certain instances when it comes to giving feedback it can be a bit of a difficult situation as you may not have too much feedback to give or you may not want to seem rude when giving constructive feedback. So, sometimes it can be easier to say nicer things. And I guess that’s okay. Everyone does it. Even I do it sometimes.

 Comments and feedback can be tricky because in some ways it’s different in writing than it is verbally. Sometimes it’s harder to articulate certain things in writing than it is in person because they may not sound the same or the way you intended it. It can be a tricky process.

Having looked back at some of the feedback from my project posts, there were some good comments that were thought provoking and got me thinking about my game and its possibilities. (I kinda wish I had the guts to look at those sooner!) Feedback on the project are very useful especially when it comes to understanding the viewpoints of everyone reading about your game and seeing if they way you explained your game is in a way the easy for others to understand the gist behind it. If you look at it that way, you could treat your classmates as your target audience as they are nearly the only people who will read about the game. So, really any feedback is pretty golden and helped me with changing certain aspects like the scenery or considering game setting.


Blogger icon (source)                                                        comment icon (source)

As I have previously mentioned, when it came to giving feedback to others I did initially focus more on the ‘Wow’ factor in their project feedback. However, after being introduced to the ’ wow, wonder, what if’ and ‘tell’, ‘ask’ and ‘give’ strategies it has helped me structure my feedback  accordingly and be able to provide constructive feedback while being considerate of others. The sample questions that came along with the strategies also provided some perspective of what to look for in someone’s post and notice if something was amiss. This in turn made it that bit easier to write feedback. So I’m glad I was introduced to the strategies.

I also found some useful tips here and there when it came to looking at how other wrote their blog. For instance, I didn’t really use too much of bullet points when it came to working on the reading tasks. However there were cases where they seemed more appropriate to convey ideas in a straightforward and linear fashion which made things easier to understand.


There is sense of getting to know other people when writing blog comments. In some ways you still get to learn about a person by the way they write and introduce themselves. Although, there may not necessarily be conversation taking place as that would depend if the author wants to or has time to go through the comments or not. However, given the situation of remote learning, it is a good way to interact with others.

Personally, I’m not one for introductions. Especially when it comes to publishing a post about myself. So after publishing it, I made a mental note to try and forget about it until I couldn’t  XD. But as I mentioned before with the whole situation, it is important to put yourself out there a bit and give others an opportunity to get to know you in some way.

Looking forward, I want to be able to read the comments more regularly than I have done so far. Spending one evening each week to look through them and maybe post a few replies would be beneficial especially in relation to project feedback.


Week 9 Reading and Writing


Overall, I think the reading assignments have helped me in getting accustomed to digesting various levels of information from more informal videos and articles to academic level papers. I would not say I am a hundred percent comfortable reading the academic papers. However, compared to when I first started out, I feel like I can work my way through it better.

Initially, it would take me a long time just to read through the first reading. By the time I reached half of the second reading, the 45 minutes were up. Then, when it came to writing the blog post, I found myself going back to the readings as I found that I could not remember enough to articulate what I had understood from those readings. It was a slow and tedious process.

Once we started working on assignments as class, it was a game changer c; I think I am very detail-oriented and this can cause me to lose sight of the objective. So when we were taught some strategies on how to approach the reading and writing, it helped me to focus on the bigger picture for completing the writing assignment on that particular topic.

What I learned from working on the tasks together was that order doesn’t matter. What I mean by this is that although the video was last on the list after the readings, it would be of benefit to watch it first as a general overview of the topic. Then you can move onto the article and the academic paper.

Secondly, it’s important to have a word document open and ready to go. The idea with the papers is that you scan through them. Any bit of information that seems relevant to the topic can be put in the document. This works the same for the video. Pause it and add a few bits of notes. Some of this will be copy and paste but that’s ok as it is only there for reference so you don’t need to go back to the papers or video as you have everything you need in the one document.

Then, when looking at the notes and information that was collected it you collate that information and try to find common ‘themes’ in the readings. An example of this would be last week’s assignment (week 8).  The topic was the theory of ‘Game Fun’. The keywords or themes that were common in all the readings and video were:  games – MDA , Types of fun, Flow theory and Learning (is part of the theory of fun in games).

Finally, it comes to actually writing the blog post in your own words underneath the keywords that serve as sub-headings.

What I need to improve on for future readings is too be consistent and implement this strategy on my own. Most importantly, I need to manage my time and not spend too long getting bogged down about a particular paragraph in the text that looks like cipher.

I’d say it wouldn’t be much of a surprise that I found the reading task on ‘Game Fun’ the most enjoyable. Leaving aside the fact that it was a group effort for the actual task and focusing more on why I enjoyed this particular reading.


(source) I chose this image because I feel like the quote accurately represents the pleasure found in games.

Well, as I may I have mentioned before I do play games when I have the time, and due to the current situation with lockdown it’s one of the main ways I get ‘hang out’ with friends. As a gamer I do find it interesting to learn about theory behind the experience of ‘fun’ in games. So it was a bit of an eye-opener to read about fun being categorized such as the ‘eight kinds of fun’ which ties into the MDA or the 4 key’s of fun by Nicole. It allowed me to think about and identify what gets the player hooked in a game in the first place. It also made me reflect on myself as a player and see where I fit in the ‘fun’ chart. Due to this particular topic being open and relevant to many people, not necessarily just game designers but also a player is why I found it a ‘fun’ and interesting read.

Now, the big question. Have I put theory to practice? Did the notes help me in creating my game? In a way, yes they have. By understanding some of theory during the reading tasks it helped me when making decisions for my game. This was the case for the GDD in particular as not only we had to do a reading task for it but also make our very own as part of the game design process. Having a reading that is directly linked with the project task was helpful in understanding what you had to when it came than to making your own.

In terms of accomplishments, I don’t know if I have any. I know I learned a lot about game design and myself through the way I work around my tasks. I’m still working through building my game in unity which is messy process. Overall, I wouldn’t say there is an outstanding accomplishment from my end. However, I do hope that I am prepared for whatever is coming next semester.


Sunday, November 22, 2020

First playable

 In all fairness I don't think my game can labelled as a 'first playable' just yet. It has only been the second week of starting our game project and I genuinely feel like I have encountered more issues than made much progress.😅

I should probably begin by saying that majority of my time was spent updating my GDD (link here) with the assets and tutorials that closely matched what I am hoping to achieve for my original game idea. In addition, changes were made to challenges and obstacles of the game. This week's unity tutorials which included the powerup mechanic and having enemies follow the player were especially useful as I am looking to incorporated these mechanics in my game as well. 

Now, getting back to talking about the actually game. I must say, it's starting to look like one of those messy challenges we must complete at the end of each Unity tutorial. 


Screenshot of my current progress with the game


Camera Movement

Adjusting the camera was my first task. The idea is to have the player rotate the camera around the character. This is similar to this week's Unity tutorials where the camera rotates around a focal point. In this case, I tried to make the player itself the focal point by adding the camera as child object of the player. 

This somewhat works. The view seems clearer when you get to rotate the camera rather than having it stuck in one place. However, if you rotate the whole way around, you will eventually lose track of the character and the view almost shifts from third to first person. 

I can't really find the root of the issue, yet. I tried adjusting the camera's position, but it didn't seem to work. I'm beginning to wonder if this has to do which the fact that I'm using the same horizontal input for the player to rotate left and right as well as the camera. 

Player Movement

The jump mechanic was included. This seemed tricky at the start as my player object is empty and I needed to create individual scripts for each of the child animal game objects for it to work. Although, strangely enough the only force I am able to use is Impulse, otherwise pressing space to jump won't work. I also got rid of the player exploit where they could press multiple times to jump while still in the air. 

Next, I was looking to see if I could set triggers and conditions for certain animations to create an idle, walk, run and eat. The animation tree looked different from the Unity tutorials so I spent some looking for the animations clips that appeared missing but were placed in a different folder. Some animation parameters were missing, but I figured out how to create them, particularly the 'trigger' which seemed useful.

I managed to set the 'idle' as the default animation. The idea was to enable the 'walking' animation when the player used the 'w' key.  However, that didn't seem to work. Perhaps, I need to target the horizontal input again?

Powerups

I began setting up a powerup for the player. So far the only interaction is that when player moves over it, the powerup disappears from the scene. I still need to look into the idea if I can create HP bars and add damage numbers in the game. This will dictate whether I want the powerups to orientate towards regaining some missing health or increase movement speed instead. 

There is a small issue with gravity I encountered later as well, where the characters seem to just fall off the plane... It may be a simple check/unchecked box which, I will need to look into as well. 


I know I need to pickup the pace. I'm hoping to work on the game bit by bit each day rather than in one session as that does take a lot of  time and energy. I'm not gonna lie, I'm starting to have some doubts on the finished game, but I'll try and stay positive for now. 🤞


Friday, November 20, 2020

Unity Tutorial 07

In this week’s Unity  tutorial we had to program an arcade-style game. The player controls a distinct dark sphere on a floating island in the sky. The goal is the goal was to knock back incoming enemy spheres. 

Here's a screenshot of my screen as I was working through the tutorial.

In this tutorial, I learned how to incorporate new game-play mechanics which adds that extra layer of ‘fun’ to the game. The game-play mechanic is known as a Power-up which is a state where the player gains an advantage for a short duration.

In this case, the power-up was a diamond-shaped object which the player ‘collects’. Although what’s going on behind the scene is that once the player touches the diamond object, said object turns inactive and disappears from the scene. In its place, a power-up indicator is set active which surrounds the player to show that the player has a temporary advantage in the game.

However, to actually add this knock-back advantage I had to add an OnCollisionEnter method. In this method we write the code where the player interacts with the enemy. I created an if-statement in this method as this is a particular condition which happens only when the player touches the power-up.


The first line of code in the method targets the enemy’s rigidbody component which we need in order to apply a force to it.

The second line is an equation using Vector3 that calculates the direction the knockback will cause the enemy to go ‘awayFromPlayer’. This equation uses the enemy’s current position and subtracts it by the player’s current position.

Then the third line applies a force to the rigidbody of the enemy when it is knocked back. This is done by multiplying the direction at which the enemy will be knocked back  by the powerupStrength which is shown below:

A ForceMode of Impluse is added to make this and ‘instant’ effect.


There was a lot more covered in the tutorials but I found this the biggest take away for me as I feel like I could use a similar mechanic for one of the animals on my current game project. Explaining some parts of the code like this also helps with being able to understand it (although I should still include comments). 


Monday, November 16, 2020

Game Fun

Games can be described by the 3 components Mechanics, dynamics, and aesthetics (MDA) or otherwise stated as rules – system – “fun”. The three reading selections this week and the synopsis below all address the term “fun” in relation to game design.

There are eight types of Fun outlined by the MDA. These eight are both a source of reference and player experience that blend together in many ways, and essentially what makes a game fun and enjoyable.


To date, the MDA papers define the '8 kinds of fun' sensation, fantasy, narrative, challenge, fellowship, discovery, expression, and submission, remain a source of reference and possibly the most popular list of player interactions combining in various forms to attract each player to a particular game.


“Fun is a byproduct of good design. It is also not essential for a good gamified system,” by Andrzej Marchewski

There are a variety of definitions to describe the term “Fun”. Both Oxford and Merriam dictionaries define Fun as an enjoyment, delight. But within the context of a game it usually refers to a form of pleasurable entertainment.

 Nicole Lazzaro conducted a study in 2004 which resulted in the “4 Keys to Fun: the game mechanics that drive play”. These keys are based on the players emotions during gameplay which  involved in defining how fun a game can be for different players. The first key (Easy Fun) gives the player an opportunity to explore the game, It isn’t demanding in terms of challenge and it relaxes the player. The second key (Hard fun) comes with a challenge and it’s when the player gets put in difficult situations which results in achievement. The next key is (People fun) is a multiplayer experience resulting in competition and participation. The last key (Serious Fun) is when the player has the freedom to change the world around them and their character.


The Concept of Flow is characterized as a balance between skill-challenge and the individual's enjoyment. When in flow the player is focused on the activity they are participating in. This gives a sense of reward and promotes further engagement in the activity.

Flow theory provides a good framework for analyzing motivation in gaming activities, in particular enjoyment, engagement and positive affect.


Figure 3: Graph showing the flow zone, where the game is not too easy where the players abilities are very high (Boredom), but also not too hard that the player is unable to complete the challenge (anxiety).


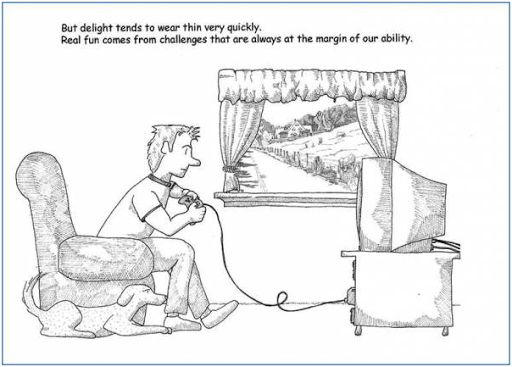
Theory of fun in game design is book written by Raph Koster in which he talks about how fun in games can give room for a large space for learning within the players involved. “Fun is the feedback the brain gives us when we are absorbing patterns for learning purposes.” – Raph Koster. Here Koster talks about the human’s ability to memorize and recognize a large array of patterns which can then be implemented in games. When our brain learns from a situation in the game whether it’s solving a puzzle or completing a quest, our brain recognizes this and dopamine is released signifying our fun in games.


There is a common thread in which many overlook games on the basis of just fun and entertainment. However, different games can teach us different things. Games can also be sectioned into different types depending on what they teach. For instance, Koster mentions Type 1 Games which require thinking, analysis and strategy techniques e.g Chess or Civilization. Type 2 Games refer to “reflex based skills” in games like shooters that require “sharp reflexes” and in fighter games that require “combo memorization and the execution”. 


“The gap between those who want games to entertain and those who want games to be art, does not exist.”

Koster concludes that by understanding how fun works in games, it will also lead to understanding of how fun is achieved in the creation of a game. This, in turn allows us to reflect and learn from our experience of the game.

Games help people to become more imaginative, engaging with their creative side of the brain and creating new ideas/designs that can be implemented in games. Being more creative when developing your game will help you see what challenges the player may face and what ones will help further improve the progression and also add to the player's determination to complete the story.


References:

Velev, A., 2016. Gamification Design: What’S Fun Got To Do With It?. [online] Megamification. Available at:<http://www.megamification.com/727-2//> [Accessed 16 November 2020].


Kaye, L. and Bryce, J., 2012. Putting The “Fun Factor” Into Gaming: The Influence Of Social Contexts On Experiences Of Playing Video Games. Available at: <https://core.ac.uk/download/pdf/9632557.pdf/> [Accessed 16 November 2020].


The Game Overanalyser., 2020. A Theory of Fun for Game Design | Raph Koster and The Art of Designing Fun Games. Available at: <https://www.youtube.com/watch?v=6sZJYA06z7Y&feature=emb_logo&ab_channel=TheGameOveranalyser/> [Accessed 16 November 2020].

Sunday, November 15, 2020

Project Prototype


For my game project this week, I began by putting theory to practice and started building my first prototype of the game in Unity.


I have imported a few assets which were used in previous Unity tutorials, such as the mountain dome from the first tutorial and the animal objects from the second tutorial. I also added a simple white plain so it didn’t look like the animals were just floating in the air.


Screenshot of work in progress project prototype

 As you can see the stage for the environment is not complete. I decided to leave the game’s environment as it is to help me visualize as I’m looking to focus on getting the game itself working and running smoothly.


This week, I decided to focus on getting three things for the game up and running:


Player Movement – This was not difficult to do as the first unit of the tutorials covered this. I was able to get the character to move and rotate based on the player’s horizontal and vertical output. However, I noticed an issue with the player’s movement in play mode once I have gotten the camera focus on the character.


Switching Characters – I was able to find a tutorial that showed how to create an option for the player to switch between different characters (game objects). I was introduced to code that we haven't touched on in previous videos. 

In this tutorial, the player needs to click on a button on the UI (User Interface) in order to switch characters. This is slightly different than what I had planned where I decided for the player to use the Ctrl key to switch between animals. However, it got me thinking that I could present the player with both options for switching characters to give the player a small option of choosing what they’re comfortable with in case there are too many game keys for the player to remember.


Camera Focus – I also did a recap on the first unit of tutorials in order to make the camera follow the player. However, I set mine different for my game as I wanted the camera to change position according to the animal’s size to make it feel like the perspective changes a little bit. So I wrote the code differently than in the tutorial.


Tutorial


My Code


To give some context, I have made an empty player object and nested two animal objects inside the player object. (This is to be able for the characters to switch.) I can’t say I have noticed a difference in perspective. I need to mess around with the positioning more. A problem that occurred when trying to do it this way is that player movement is a lot more rigid. The player moves a bit slower and the camera is a bit shaky.


Also need to figure how to make my IDE accept decimals for the XYZ camera position.


My focus for next week:

Main: Refine GDD. Include all assets, tutorials, sketches and any area of the game that I wasn’t sure about I need to work it out before I continue. I feel like I need to scale down a bit of my game idea as well.

Afterwards, I will continue adding on the game interactions.

Thursday, November 12, 2020

Unity Tutorial 06

Screenshot of my unity tutorial

This week’s tutorials were particularly fun to complete. I learned how to add music, sound effects and particle effects in order to create a polished and complete game.

The process was more simple than expected. Essentially, for the particle effects I had to attach it to the game object. This would then appear in the hierarchy as a child object of the object it was attached to.  However, in order to control when and how the particle will played it needs to write code in the script for it, usually it is included in if-statements. First a public variable has to be made for the effect as it is not directly linked to the object like other components. Then it can be dragged into the box.

A little menu box appears where you get the chance to play, stop or restart the animation of the particle effect so you can see if you need to make any adjustments. There’s an overwhelming amount of options in the inspector menu of the particle effects where you can make different interesting changes such as the velocity or color of the effect.

To add music to a scene you attach an audio source component on the main camera. Then you attach the sound clip to that component. If the music runs out, there’s an option to loop it. For specific sound effects, they need to trigger in the code. You create a public variable using the AudioClip class where you add the soundclips in the player script component in Unity. Then similar to the particle effects you write a code in the if-statement to control when you want the sound effect to play.

Challenge 3 was a bit tricky for me. This is because when I looked at the line of code and compared it with what I had written during the tutorial I had to remember what some bits of the code represented. I should start to get into the habit of writing comments next to the code for reminders. That’s it for this week. I’m curious to see how much I’ll be able to implement when starting out to create my game.  See you then!

Monday, November 9, 2020

Games Decisions

 “In order for the player to be optimally engaged, challenges should be presented at a level equivalent or slightly higher than their current skill. Not too easy, not too hard”(Gigity McD)


The word 'flow state' was coined by Csikszentmihalyi (1975) also known as being “in the zone”. This is when the player is fully engaged in the game experience. Csikszentmihalyi put a lot of work into observing and analyzing various groups of people. This theory is focused on the idea of how people should balance their skills and the demands of particular tasks. An example of Flow would be a challenge in a game that interests the player such as a puzzle or a boss battle meant to keep the player interested and not get bored. Csikszentmihalyi also states that flow is related to an ideal psychological condition when a person engages in a challenge-skill activity, often resulting in concentration and a focused emphasis on a task.


A practical technique for improving Flow is to look at what players like and find interesting, it is an invaluable resource as this will give you a better understanding of how to structure your game in a way it flows naturally without affecting the players’ experience and enjoyment. If the player has a high skill set and the game is not a challenge, the player will become disinterested and lose interest in the game. The game must allow the player to grow and learn with each challenge or obstacle so as to stay motivated to continue.

If the player has little to no skill set and the game is too challenging, then the player will become frustrated with anxiety and lose interest in the game as well. A flow chart helps to prevent the game from being too boring or too difficult(create anxiety) which makes the game more successful in terms of achieving Flow. 


The X axis is the player's skill and the Y axis is the challenge. When the player starts off, the challenges are easy in order to introduce the player to the game system. Overtime, this will  increase the player's skill. After the player has progressed through the game the challenges get more difficult. This is known as the flow channel and is the ideal place to maintain the player in the flow state. If the challenges are too easy the player will become bored of the game. If the challenges are extremely difficult for the player, the player will get overwhelmed, frustrated or fed up with the game. This is the point where the player reaches the anxiety state of the flow map.


Studies have found Cook (2008) that there are both positive and negative consequences with game flow. The positive representing cognitive flow   “composed of challenge-skill balance, clear goals, and unambiguous feedback,” and a negative element viewed as the emotional flow “composed of action- awareness merging, concentration on the task at hand, sense of control, loss of consciousness, and time transformation.” In the development of computer games, designers must be aware of these two characteristics when developing games.


References

Numinous.productions. Dan Cook 2008. Building A Princess Saving App. Available at: <https://numinous.productions/ttft/assets/Cook2008.pdf> [Accessed 9 November 2020].


McD, Gigity (14th June 2018). What is FLOW THEORY in game design? - The Basics - (Part 1). Game Design with Michael, https://www.youtube.com/watch?v=3H8pQyyXxHg


Sanjamsai S, Phukao P. 2018 Flow experience in computer game playing among Thai university students. Available at: <shorturl.at/rtvGM> [Accessed 9 November 2020].


Sunday, November 8, 2020

Game Design Document

 The GDD was fun to work on. It helped to reveal areas in the game design that where lacking or  missing  which you wouldn't think of initially because the document is very in-depth. There's a lot to think about. I know I'm done with it yet as it is a living document but I feel I might be going in the right direction with it. 

Initially, I wanted to stick with Word for the GDD as it was something I was familiar with however, I'm glad I decided to take a plunge into something new. Dundoc turned out to be very simple to use and VERY easy to maintain and LESS time consuming compared to Word. 

Dundoc has some templates ready for you to get started with. However, I decided to make my own following example from Mark Baldwin's GDD template layout. Here's a link to my GDD: https://www.dundoc.com/project/6917/neta3be22v

One of the areas I need figure out about the game is to look for assets in terms of surroundings and some other animals. Here's some images from a game by David Wehle - The First Tree. I don't too much about the game, but I found the images inspiring and could help to think about the look and feel of the game. 


Friday, November 6, 2020

Unity Tutorial 05


This week’s tutorial has been interesting. We learned some features that made our game more game-like. I realized how more comfortable I was when working through the tutorials, especially with the scripts, I was able to recall some code we used in previous tutorials.

The lessons focused on creating a fast-paced runner game where the player needs to press the spacebar to jump in order to avoid obstacles which fly towards the player.

I got a bit insight on a different way to make game objects do different things. So far,  only the Translate () method was used to bring objects into our scene. However, to make the game seem a little more realistic I got a little more insight about Unity’s own physics engine which calculates the objects mass, external forces acting on that object and gravity which simulates real-life physics in the game.

In this tutorial, I had to use the AddForce method instead, which uses Unity’s physics engine to make the character’ jump force realistic.

Screenshot of my Unity tutorial.

The Sprite Render component is a new feature I was introduced which essentially rendrs images into the game and can be used to create the 2D background just the like the forest background used for this game. We were able to make it appear like the player was moving by applying a written move script to the background (kind of like looking out the window of fast driving car).

Another useful skill was to call other methods to target different game components. Before, we only used gameObject and Transform.

To control the character’s movement, gravity and other characteristics we used new method to be able to access other components which aren’t found on every game object such as the Rigidbody. To do that we used GetComponent method.

Finally, the more part was learning to do our first animations. Animation Controller with an unusual interface that looks similar to  a mind-map diagram. When viewing the game on play-mode, the diagrams will indicate what animation state the character is in. The parameters section allows use to control the length and speed of an animation. We also managed animation transitions in our scripts using if-statements to control when the character enters different animations states depending of what the player does e.g if player accidently hits the obstacle the character transitions from a running state to an animation where he is knocked unconscious.

This was a fun unit overall. Hopefully I’ll be able to remembers most of what I learned when it comes to making my own game.

Monday, November 2, 2020

Games GDD


What is the GDD for?


A Game Design Document (GDD) is a blueprint for the design and development of a game.

The GDD is a way of being creative and documenting the approach to the development of the game. Gonzale (1999) states that “ the important thing is to have something that describes your game project (or any other project for that matter) before jumping into production.( Gamasutra ) It should help to plan out your game. Though it is recommended that the GDD should be short it needs to be detailed enough so as game developers and artists can coordinate the development of the game independently whilst still keeping to the design. The GDD is a blueprint for how the game is going to be designed and built, similar to a mind map. In conclusion, the game design document is vital to making a game and it is important to have in order to describe your game project.


Image, game design exercise preview from lynda.com


How do we make one?


There are a variety of tools that could be used to create a GDD. These include word processing tools, visual tools like Powerpoint, or new web-based tools such as DunDoc. Each of these tools has their advantages and are a personal choice. Many of the examples shared via the internet are in Microsoft Word format. Romero Games(creators of Doom) favour a more visual tool such as PowerPoint. Whichever tool is used they should support the development of the game in an open and transparent manner.


What should be in it?


The GDD should be simple enough to read through details about your game design and concept. Schubert (2007), who was at the time lead designer for Bioware Austin, gave a GDC talk in about how to create design documentation, some of the most relevant elements include:

  1. Know your target.- Have a clear vision and understanding of what you want to make. Make sure your game is suitable and fits your target audience.

  2. Keep it short.  Keep it to the point and clear, the shorter they are, the easier it is to read, write, and maintain.

  3. Prioritize the design.  - Divide your game in order of importance e.g have a functional game. Concentrate on core mechanics and visuals, and then expand. 

  4. Illustrate. - Draw sketches of your plans that make it easier to structure and implement. Present what your game would look like as it’s important to have a clear idea of the visuals before you begin creating.

  5. Use user stories.- Describing the game through the player’s vision (Similar to what we did in the game vision statement).

Take into account the games users, their ideas may help develop future storylines or ideas.

  1. Invest in a good format. Take the time to structure your work so that it is easy to navigate.

  2. Use clear terminology. Don’t over-complicate the document. Make sure language is concise and accessible.

  3. Kill redundancy.  -Recycle your code - use variables, not hard code). Always reference the new section on your page to have a clean document. Avoid copy and pasting sections.

  4. Capture your reasoning - why did you make the choices you made? What led to that thought process?

References

Nachen, Lennart. 2014 Communication and Game Design Documents accessed 02/11/2020 http://acagamic.com/game-design-course/communication-and-game-design-documents/


Ferns, Shaun (2020) Readings Week 06 accessed 02/11/2020 https://cdmonline.ie/multidev1/reading-week-06/


 Gonzalez Leandro. 2016 How to Write a Game Design Document accessed 02/11/2020 

https://www.gamasutra.com/blogs/LeandroGonzalez/20160726/277928/How_to_Write_a_Game_Design_Document.php


Doing

  We are nearing the end of this semester and the book we’ve been working throughout the semester is in its final editing stages. This week,...